What Is a DNS Leak? How to Test and Fix It in 2026
Your VPN can be connected and your browsing can still leak through DNS. Here’s how to spot a DNS leak in two minutes and fix it on every device.
Your VPN says “Connected”. The little shield is green. And your internet provider can still see every site you visit.
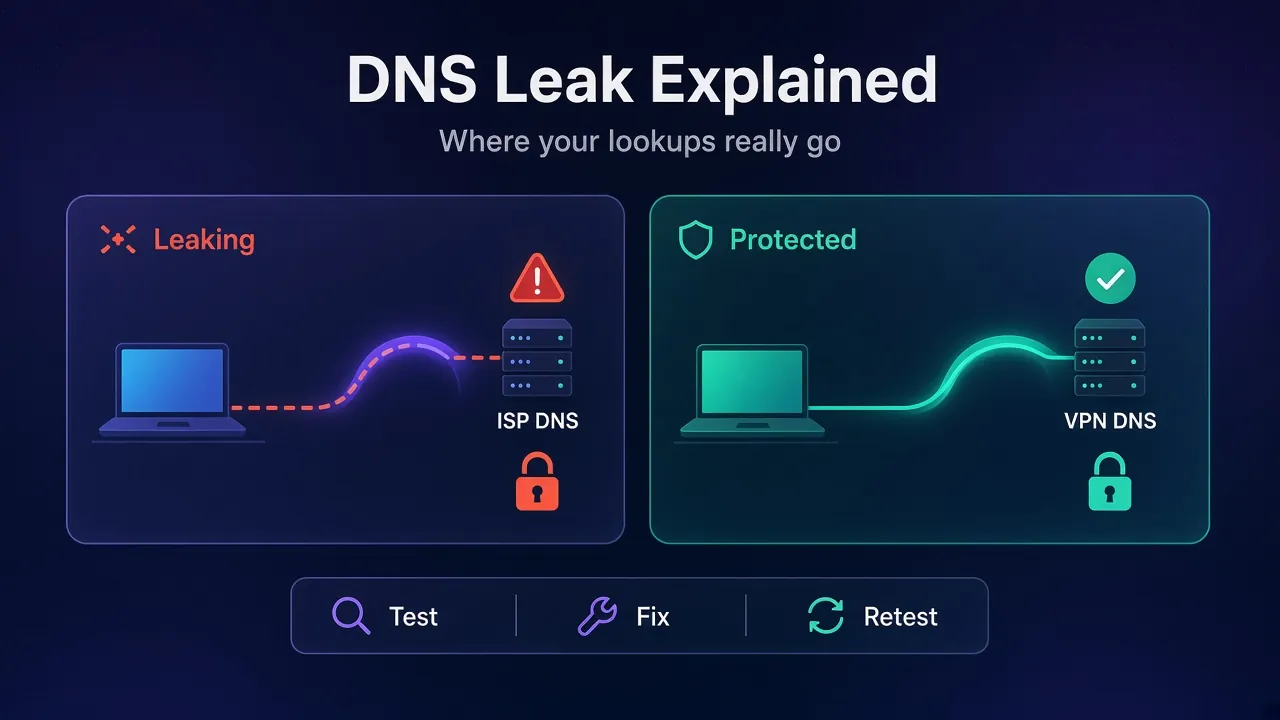
That’s a DNS leak. It happens when the lookups that turn site names into addresses slip outside your VPN tunnel and go straight to your provider’s DNS server, in plain view.
The good news: you can test for it in about two minutes, and most fixes are a single setting. The catch is that the setting is often somewhere you’d never think to look, like your browser.
Here’s what a DNS leak is, how to run a DNS leak test properly, and how to fix it on each device.
- A DNS leak sends your site lookups outside the VPN tunnel, usually to your internet provider.
- Test it in two minutes by connecting to a foreign server and running an extended DNS leak test.
- Browser secure DNS, custom DNS, IPv6 and tunnel drops cause most leaks.
- SOCKS5 proxies leak too unless the proxy resolves hostnames for you.
What a DNS Leak Actually Is
A DNS leak happens when your device sends DNS queries outside your VPN or proxy connection, usually to your internet provider’s DNS server, so whoever runs that server can see which sites you look up.
Every time you open a site, your device first asks a DNS server for that site’s IP address. If you’re new to how the tunnel itself works, our guide to how a VPN works covers the basics.
When a VPN is working properly, those questions travel through the encrypted tunnel to a DNS server the VPN controls. When it leaks, they take the old road. DNSLeakTest, a free tool run by IVPN, puts it simply: under certain conditions, the operating system keeps using its default DNS servers even while the VPN is connected.
In plain English: your traffic goes through the VPN, but the list of sites you asked for doesn’t.
Why a Leaked Lookup Gives So Much Away
A DNS query looks tiny. It still says exactly where you’re going.
By default, DNS is run by your internet provider. Proton VPN’s support guide says almost all ISPs keep logs of their customers’ DNS queries, which adds up to a browsing history (checked October 18, 2026).
There’s a second problem: mismatch. The same Proton guide notes that a DNS server’s address reveals your country. If a site sees a VPN or proxy IP in Germany next to a DNS resolver from your home ISP in India, it knows you’re masking your location.
That matters for privacy, and for anything location-based, from streaming catalogs to geo-targeted scraping. Our guide on whether a VPN hides your location explains the other signals sites compare.
Here’s the catch: a leak is silent. Pages load normally, so you won’t notice unless you test.
How to Run a DNS Leak Test in Two Minutes
You don’t need any software. A browser and a VPN connection are enough.
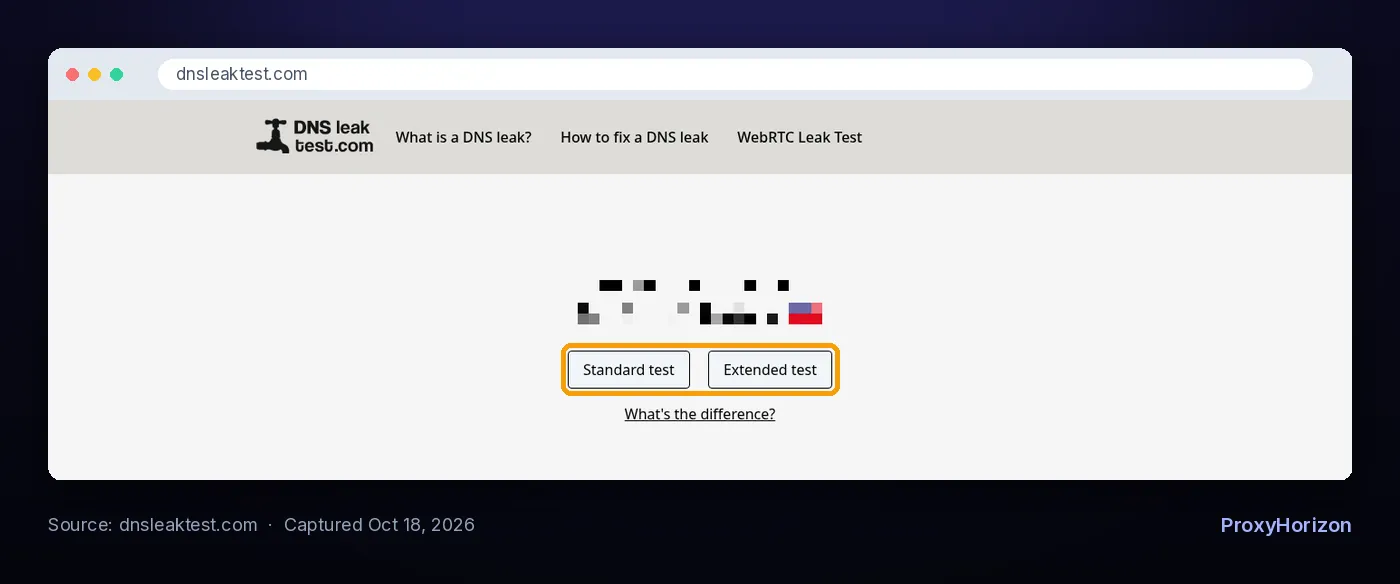
- Note your real provider. With the VPN off, open DNSLeakTest. The greeting shows your real IP and location. Remember your ISP’s name.
- Connect to a VPN server in another country. Proton suggests this because a foreign server makes leaks much easier to spot.
- Run the Extended test. It’s the one Proton’s own walkthrough uses. The Standard test is the quicker option when you just want a fast check.
- Read the result table. Look at the ISP and country columns for every DNS server listed.
- Repeat in each browser and device. Leaks are often browser-specific, so one clean result doesn’t clear your phone or your second browser.
Mullvad’s DNS leak guide describes its own connection check the same way: green means no leaks, yellow means the test failed and should be re-run, and red means leaking DNS servers (page updated June 24, 2026).
1How to Read the Results
- Your own ISP appears: that’s a leak. Your lookups are reaching your provider.
- Only your VPN’s servers or its hosting partner appear: you’re fine. Proton notes its DNS can show up under an infrastructure provider’s name, and that isn’t a leak.
- A public resolver like Cloudflare or Google appears: something on your device chose its own DNS, often the browser. Treat it as a leak and keep reading.
Testing a proxy instead of a VPN? The same idea applies. Our guide to testing proxy speed and anonymity covers the other checks worth running.
What Causes DNS Leaks
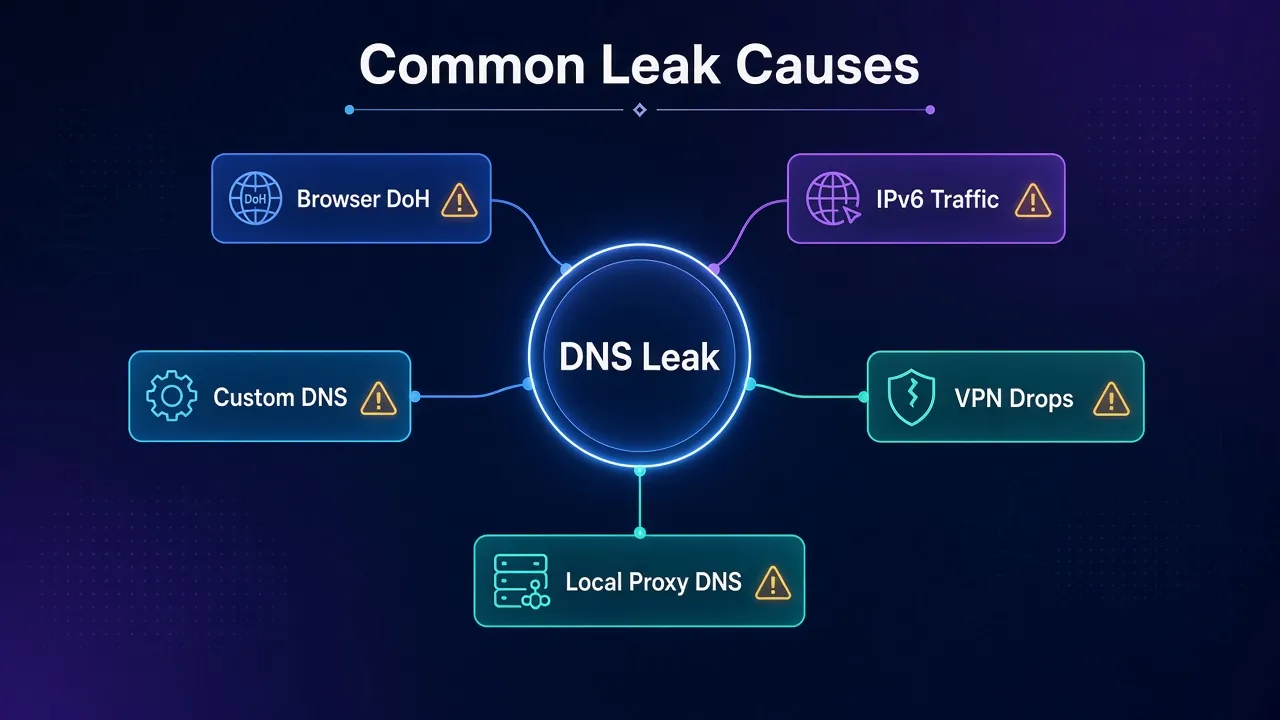
Most leaks come from a short list of settings that quietly route DNS around the tunnel. Usually it’s one of these.
1Browser Secure DNS
Modern browsers can encrypt DNS themselves with DNS over HTTPS. DNSLeakTest notes this is often on by default, and that sending queries to the browser’s chosen provider can itself count as a leak.
Mullvad says Firefox uses DNS over HTTPS with Cloudflare by default in the United States, Canada, Russia and Ukraine. Proton adds that because the queries are encrypted, a VPN app can’t see them to reroute them.
2Custom DNS Settings
If you once set Google, Cloudflare or another public DNS on your adapter or router, Proton warns that those settings can override a VPN’s leak protection. The same goes for “custom DNS” options inside the VPN app.
3IPv6 Traffic
If your network has IPv6 and your VPN neither tunnels nor blocks it, lookups can escape over IPv6. Proton, for example, says its apps simply block IPv6 connections. Mullvad’s advice for Linux users who see an IPv6 DNS address is to enable IPv6 in the app or disable it in the system.
4VPN Drops
When the tunnel briefly disconnects, your device falls back to its normal connection and its normal DNS. A VPN kill switch blocks traffic during those gaps, which is why Proton recommends turning it on.
5Windows Multi-Adapter Lookups
Windows can send DNS queries in parallel across all of its network connections. Microsoft’s documentation calls this smart multi-homed name resolution. With a VPN adapter and a Wi-Fi adapter both active, a lookup can go out both ways unless the VPN app blocks it.
6ISP Transparent DNS Proxies
Some providers don’t wait for you to use their DNS. DNSLeakTest explains that certain ISPs run a transparent DNS proxy: they intercept every lookup on port 53 and answer it themselves, whatever server you configured.
That’s why switching your adapter to a public resolver isn’t a privacy fix on its own. Your provider can still catch those plain-text queries on the way out. The only reliable answer is a VPN that carries DNS inside the encrypted tunnel, so there’s nothing on port 53 for the ISP to grab.
7Security Software and Extensions
Some antivirus suites and browser extensions take over DNS on purpose. Mullvad names Avast’s Real Site and AVG’s Fake Website Shield among the features that can cause leaks.
How to Fix a DNS Leak on Each Device
Start with the VPN app itself: turn on its DNS leak protection and kill switch, and turn off any custom DNS option. Then work through your device.
1Windows
- Set each adapter back to automatic DNS: adapter Properties, then IPv4 and IPv6, then “Obtain DNS server addresses automatically”.
- If you turned on encrypted DNS in Windows 11, Mullvad’s guide shows how to switch it off from an admin Command Prompt with
netsh dns add global doh=noandnetsh dns add global dot=no, then check withnetsh dns show global. - Admins can look at the Group Policy “Turn off smart multi-homed name resolution” under Network, DNS Client, which Microsoft documents for this parallel-lookup behavior.
2macOS
Open System Settings, then Network, pick your connection, choose Details and open the DNS tab. Remove any manually added servers. Mullvad also flags Little Snitch’s DNS Encryption feature as a leak source.
3Linux
Set DNS back to automatic in your network settings and handle IPv6 as above. If you run WireGuard by hand, the wg-quick manual says the config’s DNS line is what sets the tunnel’s DNS servers, through resolvconf. Leave it out and your old resolver stays in charge.
4Android
- Turn off Private DNS (Android 9 and newer) under Network and internet. Mullvad notes it uses DNS over TLS, which can bypass the VPN’s resolver.
- Open your VPN’s options in Settings and enable Always-on VPN plus “Block connections without VPN”. Android’s developer documentation says this blocks any traffic that doesn’t use the VPN.
- In Chrome or Brave on Android, turn off “Use secure DNS” in privacy settings.
5iPhone and iPad
Proton points out that iOS only lets apps change system-wide DNS by creating their own VPN connection, and you can only run one at a time. If you use a DNS-filtering app, switch it off while your VPN is on, then re-test in Safari and any other browser you use.
6Browsers
In Chrome, Edge and Brave, turn off “Use secure DNS” under Privacy and security. In Firefox, set secure DNS to Off under Privacy & Security. Remove extensions that change DNS. Then run the Extended test again.
Best practice: fix one thing, re-test, and stop when the result is clean. That way you know which setting caused it.
DNS Leaks With Proxies: The SOCKS5 Trap
DNS leaks aren’t only a VPN problem. Proxies leak too, and it’s usually a one-letter mistake.
A SOCKS5 proxy can either receive the hostname and look it up on the far side, or receive an IP address your machine already looked up. The curl manual spells out the difference: socks5:// resolves the hostname locally, while socks5h:// lets the proxy resolve it.
With local resolution, your own DNS server sees every target domain, and the site sees a proxy IP that doesn’t match your resolver’s location. Many browsers, scrapers and automation tools have a similar “remote DNS” or “proxy DNS” option. Turn it on.
Our guide to how SOCKS5 proxies work explains the handshake behind this.
DNS Leak vs WebRTC Leak vs IP Leak
These three get mixed up all the time. They expose different things and need different fixes.
| Leak type | What escapes | Who can see it | Typical fix |
|---|---|---|---|
| DNS leak | The site names you look up | Your ISP or a third-party resolver | Leak protection, no custom or browser DNS |
| WebRTC leak | Your real IP, through the browser | Websites running scripts | Browser setting or extension that limits WebRTC |
| IP leak | All traffic after a tunnel drop | Your ISP and every site | Kill switch |
| IPv6 leak | IPv6 traffic and lookups | Your ISP and IPv6 sites | VPN with IPv6 support, or disable IPv6 |
A clean DNS leak test doesn’t mean you’re invisible. Our guide on whether you can be tracked with a VPN covers what a VPN can’t hide.
Keep It Fixed: A Short Prevention Checklist
- Use a VPN app with built-in DNS leak protection and keep its kill switch on.
- Leave DNS on automatic everywhere: adapter, router and VPN app.
- Decide on purpose whether your browser uses secure DNS, and know that it bypasses the VPN’s resolver.
- Make sure your VPN covers IPv6, or turn IPv6 off.
- Use remote DNS (
socks5h) for SOCKS5 proxies. - Re-test after VPN updates, OS updates and new browser installs.
Shopping for a provider that gets this right by default? Compare leak protection and kill switches in our VPN directory.
Frequently Asked Questions
Test Once, Then Test Again After Every Change
A DNS leak is one of the easiest privacy problems to fix and one of the easiest to miss. Your VPN keeps saying “Connected” while your lookups go to your provider.
Most leaks trace back to a short list: browser secure DNS, custom DNS servers, IPv6, tunnel drops and SOCKS5 proxies that resolve locally. Each has a one-setting fix.
Our take: run the Extended test on every browser and device you use with a VPN, fix one setting at a time, and re-test after updates. If you’re still choosing a provider, our roundup of the best VPN services for privacy is a good place to start.
Keep Reading
More articles you might enjoy